Showing posts with label website. Show all posts

Monday, 10 January 2011

Final Website Design


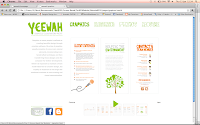
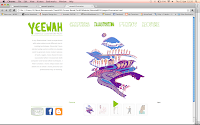
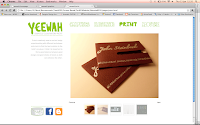
Overall I am very pleased with how my website turned out, even though there were a lot of ups and downs and I found it hard to get used to the new software of Dreamweaver because I’d never used before, I managed to get through this project successfully.

I found this brief the most enjoyable because I was able to create my own brand identity, which will be very useful for future portfolio/cv work. JQuery was very hard to figure out at first and coding was a completely new language to me. A lot of trial and error was needed so that I could familiarise myself with how Web Design worked. A lot of the time I felt very pressured for time and it was very stressful trying to figure out how hosting worked. Although after seeing how my website turned out I think it was all worth it.

Things to do after handing in to improve my website is to add metatags so that people can find my website. Add more work to my galleries, improve and personalise my contact form and update my profile picture from time to time.

In addition, I must check to see that my website works on cross browsers and test it out on other people’s computer and monitor screens to see the quality and make any amendments if needed. Also, my homepage still is a bit faulty sometimes because of the JQuery I used. I’m starting to think that there’s an error in the code I used so maybe when I have time I need to find another code that allows me to fade my images in and out when the cursor is hovered over it.

Monday, 13 December 2010

Tutorial


1) Homepage- image sizes (for smooth JQuery) when slices less than 250K

2) About Me- steer away from photographs, can maybe use drawing of self or a photo of me in my working environment

3) Overview of each topic replacing welcome intro- short description of why passionate about graphics/illustration/print intro rather than same text from homepage

4) Use live text rather than an image of text otherwise might not be legible and will take ages to load- use default fonts!

5) Think about point size for smaller monitor screens

6) Portfolio- if using slideshow, include play/pause button so viewer has choice of taking their time looking at work

7) Use title and description of work as captions

8) Tabs- grey box surrounding doesn’t fit with the style of the rest of the website

9) Cross browser- research how website might look on other browsers, test on Adobe Browser Labs

10) FTP- to upload all pages and image and css/Jquery

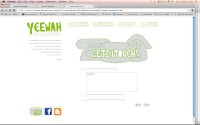
11) HTML contact form rather than including email address- efficient, professional and secure- design a ‘mail to’ button

12) Links- file names must have no spaces for these to work

Overall, website works well and represents me well. Good consistent styling of website and suitable choice of colours.

Get in Touch Button and Download CV Button:


Sunday, 5 December 2010

Logo and Icons

After receiving advice about my logo from the last tutorial I figured it was time to take a look at this part of my branding because it would be a vital image that would represent me and my work. I decided to go for the name ‘yeewah’ in the end. It is my Chinese name, but it has a design-like sense to it because of the weird combinations of letters used and the way it sounds when said out loud. I wanted to keep the summery green (pantone 276C) because I felt this represented my personality of being happy and friendly quite well, but not too feminine. I tried to incorporate some sort of pattern into the logo which could be used throughout the website so to link thelogo to the layout of the page (ie. The dotted green line).

In addition to my logo I also designed my own icons to go with my quirky style. These include the facebook icon, blogger icon and contact information icons. I also have the idea of making the information icons interactive, like the door of the house opening or the phone ringing, but I’ll get round to that if I have time.


Friday, 3 December 2010

Tutorial

So, the first tutorial since starting this project, I was pretty confident this time around because I felt like I actually considered my layouts well after numerous scamping sessions. Things that came up about my ideas were:

1) Need to think about columns, grids and how JQuery would fit into my layout (is. The simpler the better)

2) Don’t use the word ‘livebriefs’ because it suggest amateur or being a student which is not what we want. Want to come across as professional and motivated to find jobs.

3) Use ‘yeewahkwan’ instead of ‘Vix’ for logo because otherwise it sounds too casual like a secondary school nicknameà not professional.

4) Layout is ok, but play around with it a bit more.

5) Look at my colour palette and logo.

6) Too much white space, utilize space better and use it to showcase your work in the best possible way.


Wednesday, 1 December 2010

Initial Ideas

I began drawing out scamps of initial ideas which just came to mind after researching the importance of navigation. A lot of ideas came out of just random scamping and I felt this was a good starting point from which to pick and develop the ideas with the most potential. Hurrah for manic scamping!

I translated the best designs onto the computer using Photoshop to see which layout realistically worked the best. I started out with looking the homepage first because I felt this was probably the more important page of my website because it would be the first page a viewer would comeacross when visiting my site, thus it would give them the first impression.

For this project I wanted to create my own typeface to represent myself. This would be a massive challenge but also a very rewarding and meaningful one because it would brand me as a person and designer.